The acronym FTP stands for File Transfer Protocol. Transferring files to and from your web site will require an FTP client.
For Nexicom servers, our technicians recommend using WinSCP for Windows and Cyberduck for Mac. The software can be downloaded from the following links:
- WinSCP – https://winscp.net/eng/download.php
- Cyberduck – https://cyberduck.io/?l=en
Online Guides for using the software can be found here:
- Guides to Using WinSCP – https://winscp.net/eng/docs/guides
- WinSCP F.A.Q. – https://winscp.net/eng/docs/faq
- Cyberduck Help – https://help.cyberduck.io/
Connecting to FTP server
Before Starting
Before using the software, you will need to know some information about your web site.
- Host name of the server (eg. ftp.domain.ext)
- Protocol the server supports (Nexicom servers support FTP, and not SFTP, FTPS, etc.)
- FTP account username
- FTP account password
Connecting For the First Time
Start WinSCP by double-clicking the icon on your desktop.
![]()
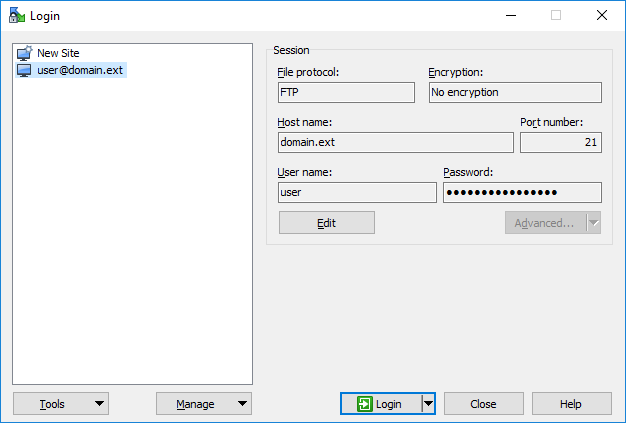
The Login Dialog will appear. On the dialog:
Select your File protocol. Select FTP from the drop down.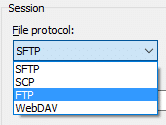
Enter your host name to Host name field, username to User name and password to Password. The Port number should be 21.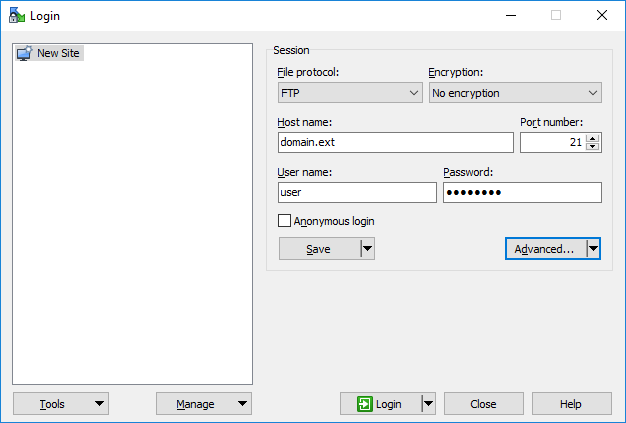
Click the Advanced button and select Advanced from the drop down.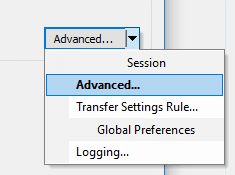
Click Connection from the left column, uncheck Passive mode, and then click OK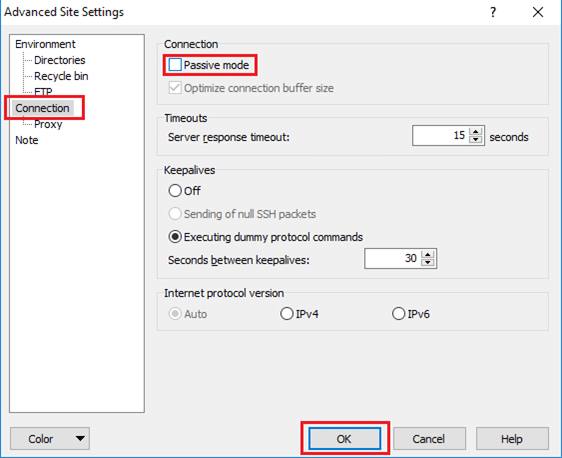
Click the Save button. You may want to check Save password so you do not need to type it in every time you want to connect. Click OK.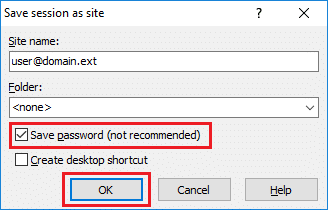
Press Login to connect.![]()
Connecting After First Time Setup
Select your site from left column and click Login to connect
.
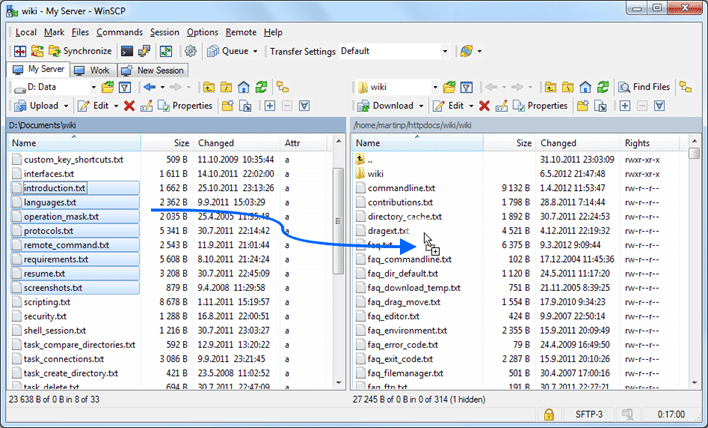
Upload files to FTP Server
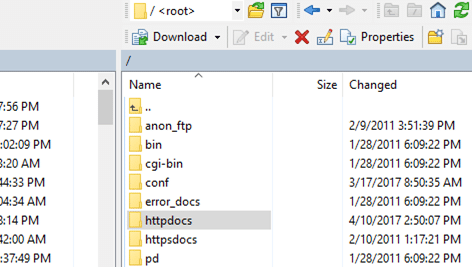
Once connected to your FTP server, you will see content of the default remote directory (typically a home directory of your account) in the remote file panel located on the right half of screen.
Your web site files are located in the httpdocs folder. You will need to double-click the folder to navigate there first in order to upload the files to that directory.
Your local files are located on the left half of the screen. You will need to navigate to the folder containing the web site files you are uploading.
Now you can simply drag the local files and drop them on remote file panel. By default transfer settings dialog will appear. Typically you do not want to change any settings, so just press Copy.
Uploading will proceed. Once it finishes, you will see uploaded file in remote file panel.