
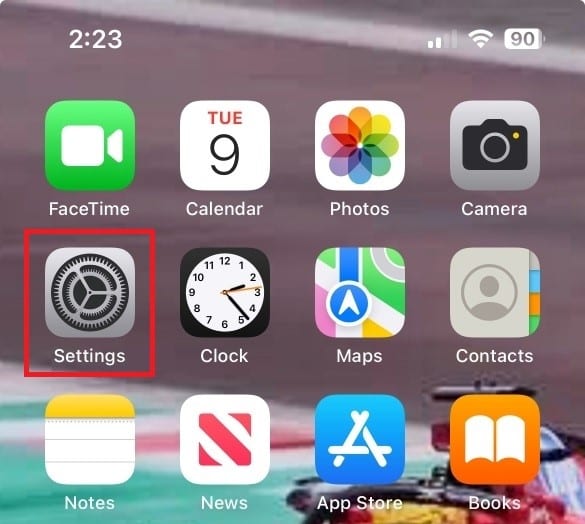
- Tap “Settings”.
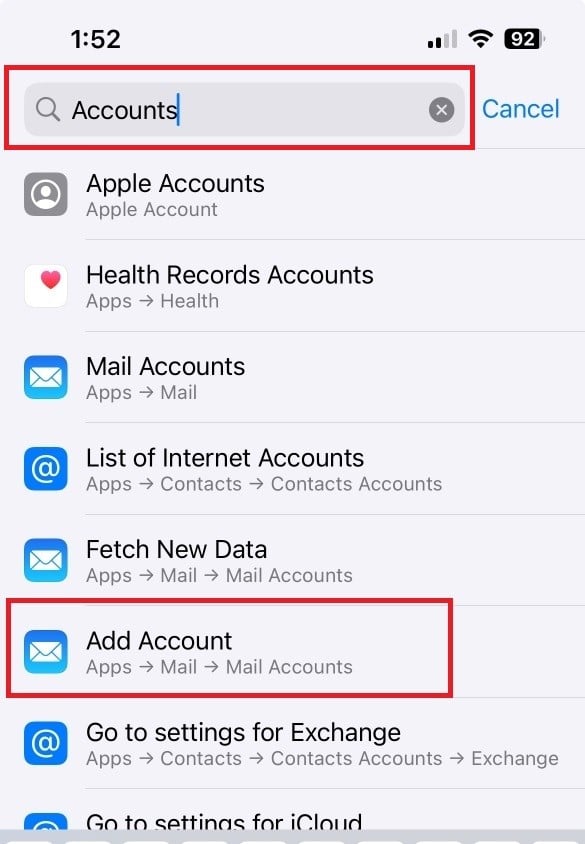
2. In the search box at the top of the screen, type “Accounts” and then select Add Account.
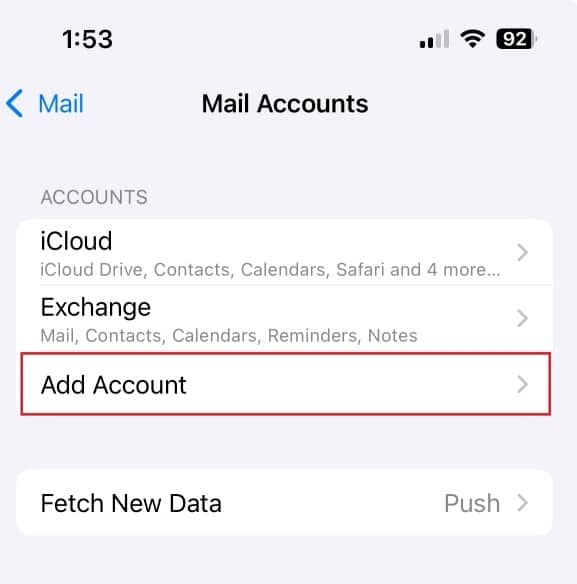
3. On the Mail Accounts screen tap, “Add Account”.
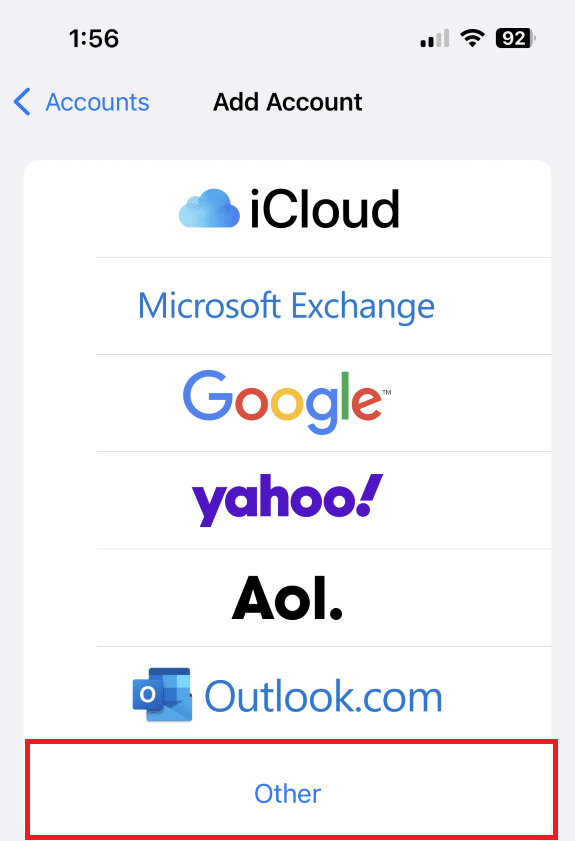
4. Tap “Other”.
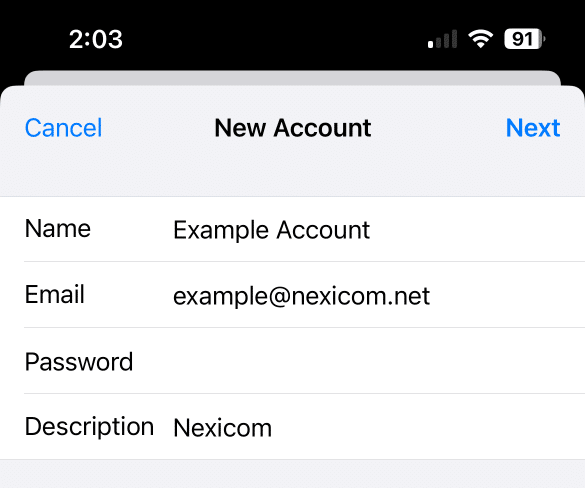
5. Fill in the Name field with your name, the Email field with the @nexicom.net address you are setting up, and the Password field with the email account’s password.
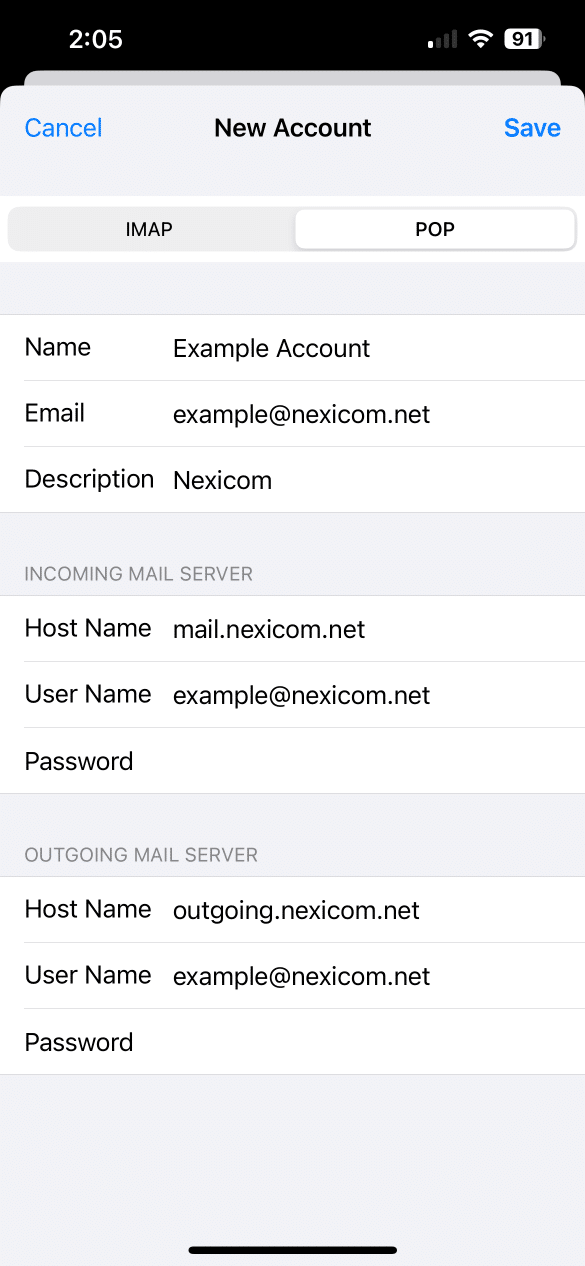
6. Select “POP” and fill in the following server information.
POP Server Information
Incoming Mail Server
- Host Name: mail.nexicom.net
- Username and Password: These fields will automatically fill with the information you provided in the previous step.
Outgoing Mail Server
- Host Name: outgoing.nexicom.net
- Username: Your full email address.
- Password: The password for your email account.
Note: The Outgoing Mail Server is required for Nexicom email, even though it may appear as optional.
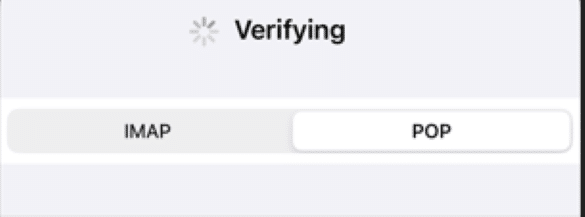
7. After entering information the system will spend time “Verifying”. The message will show at the top screen.
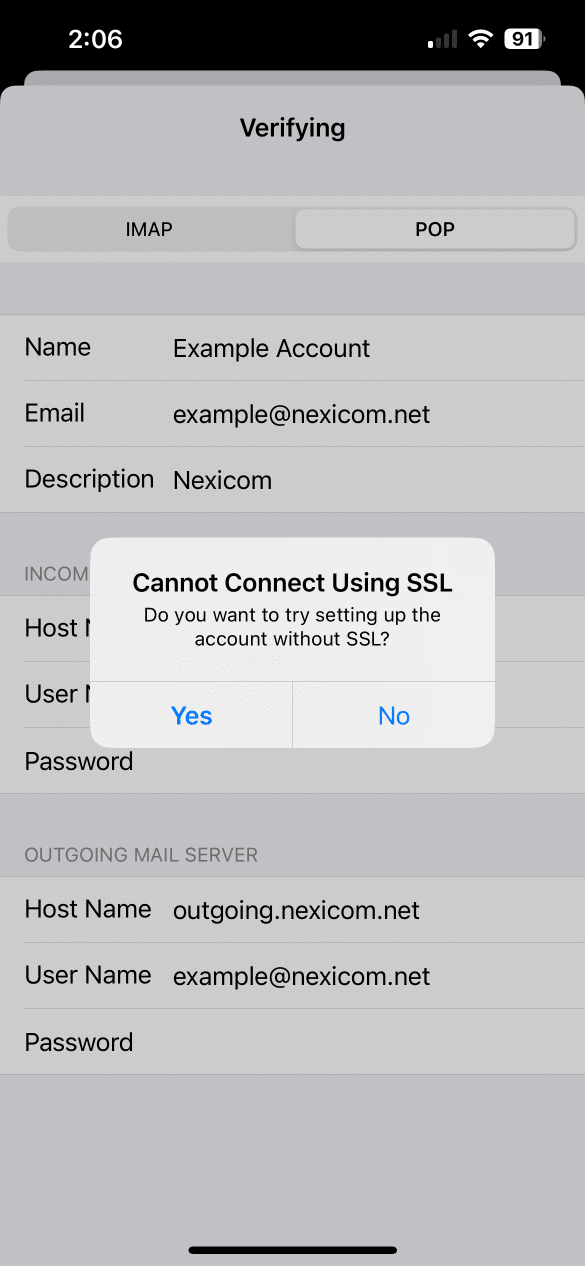
8. When prompted to set up the account without SSL, tap “Yes”. This will happen twice—once for incoming mail and again for outgoing mail.
9. The email setup process is now complete.


